Lathe machines offer precision. They shape metal with accuracy. In this blog, you'll uncover the essence of turning operation on lathe machine. Dive deep. Gain insights. Acquire unparalleled expertise.
 |
 |
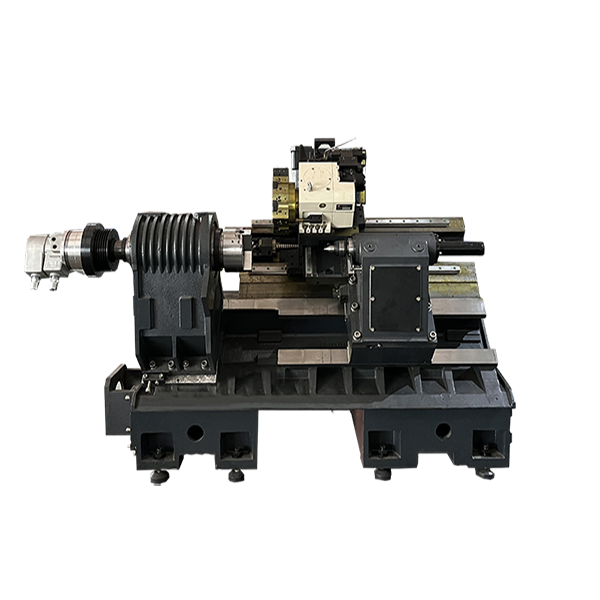
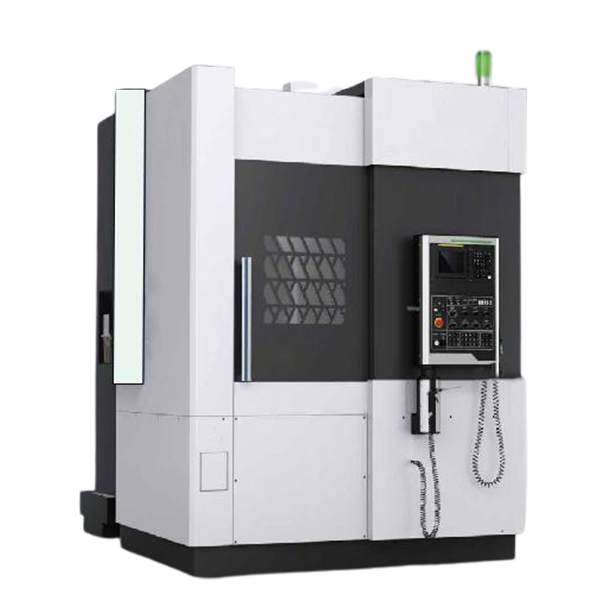
| CNC Horizontal Lathe Machine | CNC Vertical Lathe Machine |
Dive deep into the realm of lathe operations. Specifically, focus on the turning operation. Here, the workpiece rotates while a single-point cutting speed tool moves parallel to the axis of rotation. During the operation, chips get removed from the workpiece to produce a cylindrical surface. The main parameters include.
Often between 500 and 2000 RPM, determines how fast the workpiece rotates.
Usually from 0.2 to 0.6 mm/rev, dictates the tool's movement speed.
Typically 1 to 5 mm, it's the tool's penetration into the workpiece.
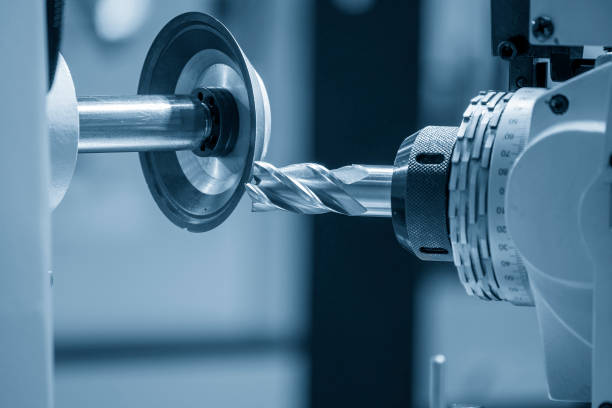
Turning operation on a lathe machine defines precision. During turning, a cutting tool removes material from a rotating workpiece. The machine holds the workpiece in a chuck. Next, the cutting tool moves linearly. While the workpiece rotates, the tool cuts.
RPM (Revolutions Per Minute) influences the process. Speed, feed, and depth are critical parameters. Skilled operators understand these values. Selecting the right RPM optimizes the result. Thus, turning ensures perfect cylindrical shapes.
In straight turning, you address the outer surface. Typically, this operation occurs on the workpiece's external diameter. Lathes set specific parameters. These settings ensure uniformity and consistency.
For instance, a depth of 2-3 mm becomes the norm. Tools, like HSS (High-Speed Steel), are common. Proper lubrication ensures smooth finishes.
Shoulder turning focuses on producing steps or shoulders on the workpiece. A precise transition between different diameters is the goal. With a difference of maybe 10-15 mm, you achieve distinct sections. Machine settings, especially the feed rate, play pivotal roles. Carbide-tipped tools prove beneficial here. Constant monitoring is vital. Only then, accuracy remains uncompromised.
Profile turning is about producing irregular shapes. Unlike the previous types, here the contour dictates the process. Curved, angular, or sloped surfaces come under profile turning. It's intricate.
Special templates guide the cutting tool. CNC (Computer Numerical Control) lathes excel in profile turning. Why? Because programmed commands enhance precision. By inputting exact coordinates, you achieve desired shapes. Always remember, for successful profile turning, align tool-tip with the machine's axis.
Proper alignment guarantees high control quality results. The selection of the correct tool, perhaps a diamond-tipped one, optimizes the outcome. Every detail in profile turning needs meticulous attention.
Only through diligence can perfection be realized.
In turning operations, tool geometry dictates quality. Tool rake angle, relief angle, and tool point angle are critical parameters. Correct settings improve surface finish.
Tool materials like high-speed steel (HSS) or carbide make a difference. Each material needs specific geometry for optimal results. Additionally, the tool nose radius impacts finish.
Feed rate determines the distance a tool moves per revolution. Higher feed rates increase material removal. However, excessively high rates may damage both tool and workpiece. Ideally, a balance between speed and precision is crucial. Recommended feed for steel ranges between 0.2 to 0.6 mm/rev.
Cutting speed, measured in meters per minute (m/min), affect finish and tool life. Different materials require varying speeds. For instance, aluminum has a higher cutting speed than carbon steel. Speed selection can influence heat generation. Thus, always refer to machine manuals for guidance.
Different metals behave uniquely during turning. Hardness, ductility, and thermal conductivity play roles. Materials like titanium demand lower speeds. Brass, on the other hand, allows for higher speeds. Always consider workpiece material properties before starting.
Proper coolant use enhances tool life. Coolants dissipate heat, reduce friction, and remove chips. Some operations may require flood cooling, others mist. The type of coolant - synthetic, semi-synthetic, or soluble oil - impacts performance.
The stability of the machine is paramount. A rigid setup prevents vibrations. Vibrations degrade surface finish and tool life. Always ensure the lathe is anchored firmly. Components like the tailstock and carriage add to machine rigidity.
Regularly inspect tools for wear. Worn tools produce poor finishes. Flank wear, crater wear, and nose wear are common signs. Change or sharpen tools when wear exceeds the permissible limit. Monitoring tool life ensures consistent results.

Facing, a primary turning operation on lathe machine, establishes precise flat surfaces. Industries highly value this method for component accuracy. Essential parts like motor heads and flanges benefit immensely.
Thus, proper facing becomes paramount in manufacturing sectors. Mastery ensures product uniformity, longevity, and overall excellence. Superior surface finishes and accurate dimensions result.
Before starting, ensure the tool's tip aligns with the workpiece center. Utilize precision instruments, perhaps a dial indicator. Accurate alignment guarantees optimal cut, ensuring minimal wear on the tool.
Properly chucking the workpiece holds paramount importance. A strong grip ensures safety and accuracy. The lathe's chuck, a key component, offers variable pressure. Applying adequate force avoids workpiece wobble during operation.
Decide your desired cut depth. Micrometers or calipers serve best. Adjustments to the lathe's cross-slide control this. Depth selection directly impacts the finish quality. Ensure settings comply with material specs.
The feed rate influences the surface finish. Optimal rates vary based on material type. Materials like aluminum demand different rates than steel. Consulting manufacturer's guidelines offers clarity.
Power on the lathe posts adjustments. Remember, RPM settings vary by material and diameter. Ensure adherence to prescribed speeds, maximizing safety and unlocking efficiency.
Continuously observe the workpiece surface. Utilize touch and visual cues. Smoothness and uniformity remain crucial. Adjust tool position or feed rate as necessary.
In a turning operation on a lathe machine, precise adjustment matters. Every cut taken is crucial. Optimal depth settings, often between 0.5-2.5mm, determine final product quality. Moreover, feed rates range from 0.2-0.6mm/rev, impacting surface finish.
Turning tools, like CNMG or DNMG, are chosen based on material type. Tools have specific angles, such as 55° or 80°, suitable for distinct tasks.
Furthermore, RPM (Revolutions Per Minute) can vary. For steel, 120-150 RPM proves effective. Meanwhile, aluminum requires 200-250 RPM. Proper adjustment ensures flawless results, highlighting the lathe's proficiency.
After the turning operation, validation is paramount. One measures the surface using precision instruments like micrometers and dial indicators. A deviation of 0.01-0.05mm might indicate inaccuracy. Furthermore, a surface roughness tester gauges the quality.
Desired roughness values typically range between Ra 0.2-1.6µm. If not in this range, reconsider tool selection or machining parameters. High-speed steel (HSS) tools offer different outcomes than carbide inserts.
Always recalibrate tools post every operation cycle. Regular inspection establishes product consistency, epitomizing professional mastery in lathe operations.
|
Parameter |
Description |
Importance Scale (1-10) |
Tools/Equipment Needed |
Metric Unit |
Typical Value/Range |
Potential Errors |
|
Facing Operation |
Achieving Flat Surfaces |
N/A |
N/A |
N/A |
N/A |
N/A |
|
Introduction |
Overview of process |
7 |
None |
N/A |
N/A |
Misunderstanding |
|
Tool Positioning |
Alignment of cutting tool |
9 |
Alignment tools |
Degree |
0-5° |
Misalignment |
|
Secure Workpiece |
Holding object securely |
10 |
Chuck, clamp |
N/A |
N/A |
Improper clamping |
|
Set Depth of Cut |
Cutting layer thickness |
9 |
Micrometer, caliper |
mm |
0.5-3mm |
Over/Under cutting |
|
Adjust Feed Rate |
Speed of tool movement |
8 |
Feed rate dial |
mm/rev |
0.05-0.5mm/rev |
Fast/slow feed |
|
Engage Lathe |
Starting the machine |
8 |
Lathe switch |
N/A |
N/A |
Late/early start |
|
Monitor Finish |
Checking surface quality |
9 |
Visual, touch |
Ra |
0.1-6.3μm |
Uneven finish |
|
Final pass adjustment |
Finalizing surface finish |
9 |
Dial, micrometer |
mm |
0.01-0.5mm |
Improper final finish |
|
Verify Flatness |
Ensure surface is flat |
10 |
Straightedge, feeler gauge |
μm |
0-15μm |
Non-flat surface |
Table on Facing Achieving Flat Surfaces!
Knurling on a lathe serves dual purposes. Firstly, knurling enhances grip on metal objects. Think of handles or tools. Secondly, knurling adds an appealing design on surfaces.
In the turning operation on a lathe machine, the tool makes impressions on a workpiece. Different tools produce varied patterns. RPM, feed rate, and tool pressure matter. Lathe settings need precision for desired results.
Straight knurling results in parallel lines. In a turning operation, using a straight knurl tool achieves this. Uniformly spaced grooves appear on the workpiece. Operators adjust the lathe's RPM for perfect outcomes. The depth varies depending on the tool pressure.
With ideal settings, the end product shows clean, straight grooves. Professionals prefer this for a simplistic look.
Diagonal knurling creates slanted patterns. With the right tool in a lathe operation, slanted lines emerge. Adjusting feed rate influences the outcome's angle.
It's crucial to ensure uniform pressure throughout. Skilled operators achieve patterns at a consistent angle. Diagonal patterns provide both aesthetics and functional grip.
Crossed knurling involves intersecting lines. By overlapping diagonal patterns, a crisscross effect appears. Expertise in lathe operation ensures precise intersections. Tool position, feed rate, and RPM need careful calibration. Crossed patterns often signify top-tier craftsmanship.
Diamond knurling, a combination of crossed patterns, forms small diamond shapes. Employing two knurling tools in succession achieves this effect.
Precision in lathe operation is paramount. The right balance of tool pressure and RPM brings out perfect diamond patterns. Renowned for aesthetics, diamond knurling remains popular among artisans.
Understand the compound slide's pivotal role. In taper turning, you adjust the compound slide to a precise angle. That angle corresponds directly to the taper degree needed.
Mastery in taper turning requires skillful use of the tailstock offset. By slightly moving the tailstock left or right, minute taper adjustments become feasible.
Prioritize the form tool selection. The right form tool ensures clean, precise cuts. Remember, form tools wear out; always check for sharpness.
Embrace the advantages of the taper attachment. By connecting it to the lathe bed, you secure a direct path for producing long, uniform tapers.
Angles matter greatly. Use precise instruments, like protractors or digital angle finders, to determine the exact taper angle. Incorrect calculations lead to undesirable results.
Before finalizing, always make test cuts. By analyzing these test cuts, you gather essential data. Feedback from these cuts allows necessary adjustments, ensuring perfection.
Taper turning is an art of details. Hence, even after test cuts, engage in fine adjustments. Minute tweaks can lead to unmatched precision.
Post the turning process, always measure. Utilize precision instruments, such as micrometers or vernier calipers, to confirm the taper's accuracy. Accuracy checks validate the entire operation's success.
Upon completion, inspect the finished surface. Smoothness, shine, and absence of tool marks denote success. A flawless surface reflects mastery in the turning operation on a lathe machine.
Before commencing any turning operation on a lathe machine, centering the workpiece remains crucial. Accurate centering ensures precision during drilling. Every expert understands that misalignment, even by a few millimeters, compromises the end product's quality.
You don't just pick any drill. The choice depends on the material and the desired hole size. High-speed steel (HSS) drills remain ideal for most metals, while carbide-tipped ones suit hard materials.
Understanding the correct RPM (revolutions per minute) remains paramount. Different materials require varied speeds. For instance, aluminum requires higher RPM than steel. A correct speed setting reduces wear on the drill and prevents overheating.
Once the drill is selected, alignment follows. The tailstock should be precisely aligned with the workpiece's center. Proper alignment guarantees that the hole is straight and to the desired depth.
Continuous drilling can cause problems. Heat buildup and chip accumulation might occur. Hence, the technique of peck drilling is employed. By drilling a short depth, retracting, and then advancing again, you allow for better chip evacuation and reduced heat.
For turning operations on a lathe machine, controlling the drilling depth stands essential. Using a depth stop or marking the desired depth on the drill ensures consistent and precise holes.
During drilling, metal chips get produced. Accumulated chips can hinder the drilling process. Regularly clearing them ensures a smooth operation. Using a brush or compressed air proves effective.
Reaching the correct final depth signifies a job well done. Always double-check using calipers or a depth gauge. Ensuring the drilled hole meets the precise specification showcases professionalism.
In precision metalwork, eccentric turning is paramount. By offsetting the workpiece's rotational axis, distinct profiles emerge. Two reference points, known as centers, determine the offset.
Lathe machines often undertake boring operations. Boring ensures the creation of accurate and precise internal diameters. The tool, boring bar, finds extensive usage here. Accurate depth and diameter measurements enhance machine efficiency.
Threads are vital for many components. Lathes enable the creation of both internal and external threads. Tools with specific profiles carve threads into workpieces. Thread pitch and depth, crucial parameters, demand meticulous attention.
Gears power numerous machines. On lathes, specialized cutters craft gears with exacting specifications. Each tooth's height and depth require precision.
Parting off, or cutting a component from a larger piece, is routine. A parting tool, thin and sharp, performs this. Adequate speed and feed rates ensure clean cuts. Too slow, and workpiece damage could occur.
Creating spherical shapes? Ball turning is the answer. Using a designated ball-turning attachment, lathes transform cylindrical workpieces. Accuracy in radius measurement is the key to perfect spheres.
Drive shafts often feature splines. Lathe machines assist in spline cutting. Dedicated tools carve grooves, ensuring tight fits between mating parts. Depth and width of each groove matter greatly.
Lathe operations, diverse and intricate, demand expertise. You've unraveled the complexities of turning operation on lathe machine. From simple facing to sophisticated gear cutting, mastery is evident. For further excellence in lathe machinery, rely on CNCYANGSEN.